

Why You’ll Love This Homemade Chocolate Cake
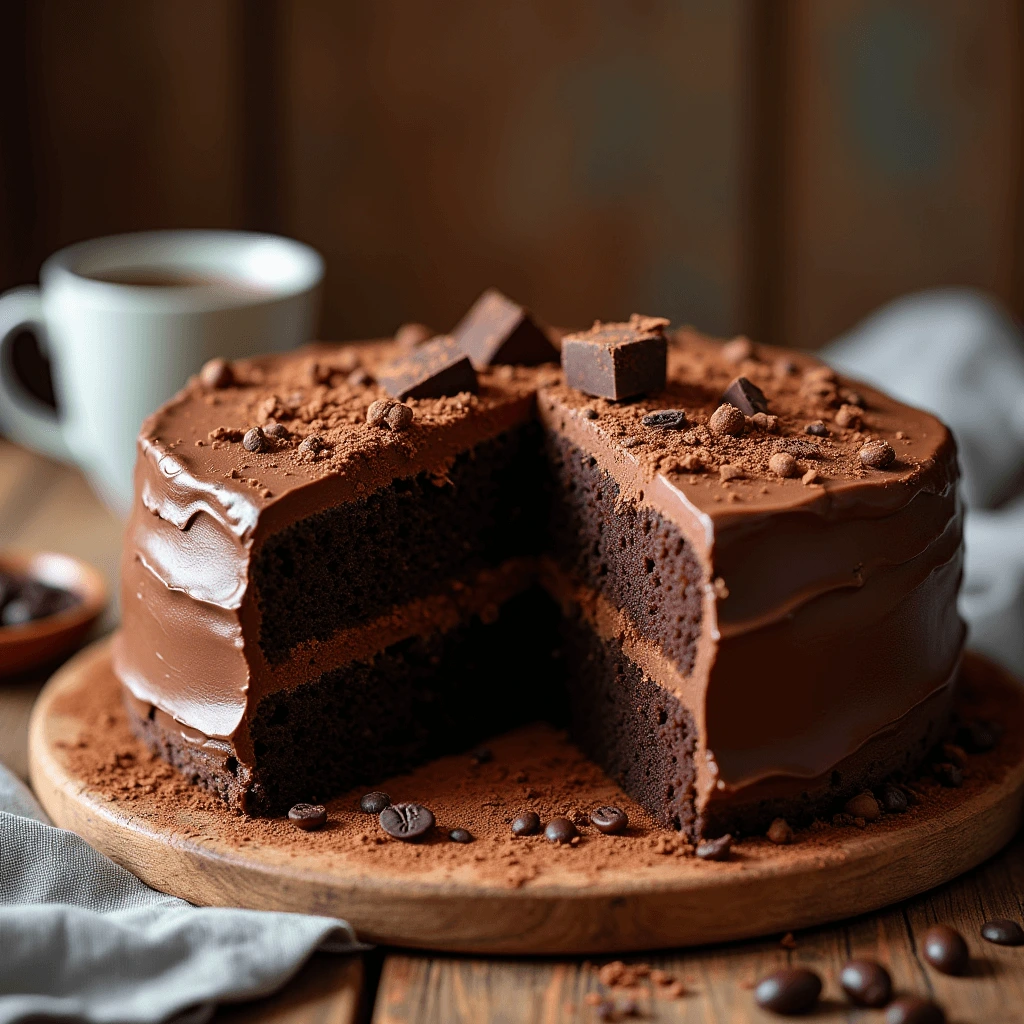
Imagine the irresistible aroma of chocolate wafting through your kitchen—this homemade chocolate cake is pure decadence in every bite! With its perfectly moist texture and rich chocolate flavor, it’s the kind of dessert that leaves a lasting impression.
This recipe is not only quick to make (prep time is just 15 minutes!) but also uses pantry staples you likely already have. Whether you’re baking for a special occasion, family gathering, or just to satisfy your sweet tooth, this foolproof recipe is designed to deliver every time.
Why you’ll love it:
- Time-Saving: Ready in under an hour from start to finish.
- Beginner-Friendly: Perfect for new bakers with easy-to-follow steps.
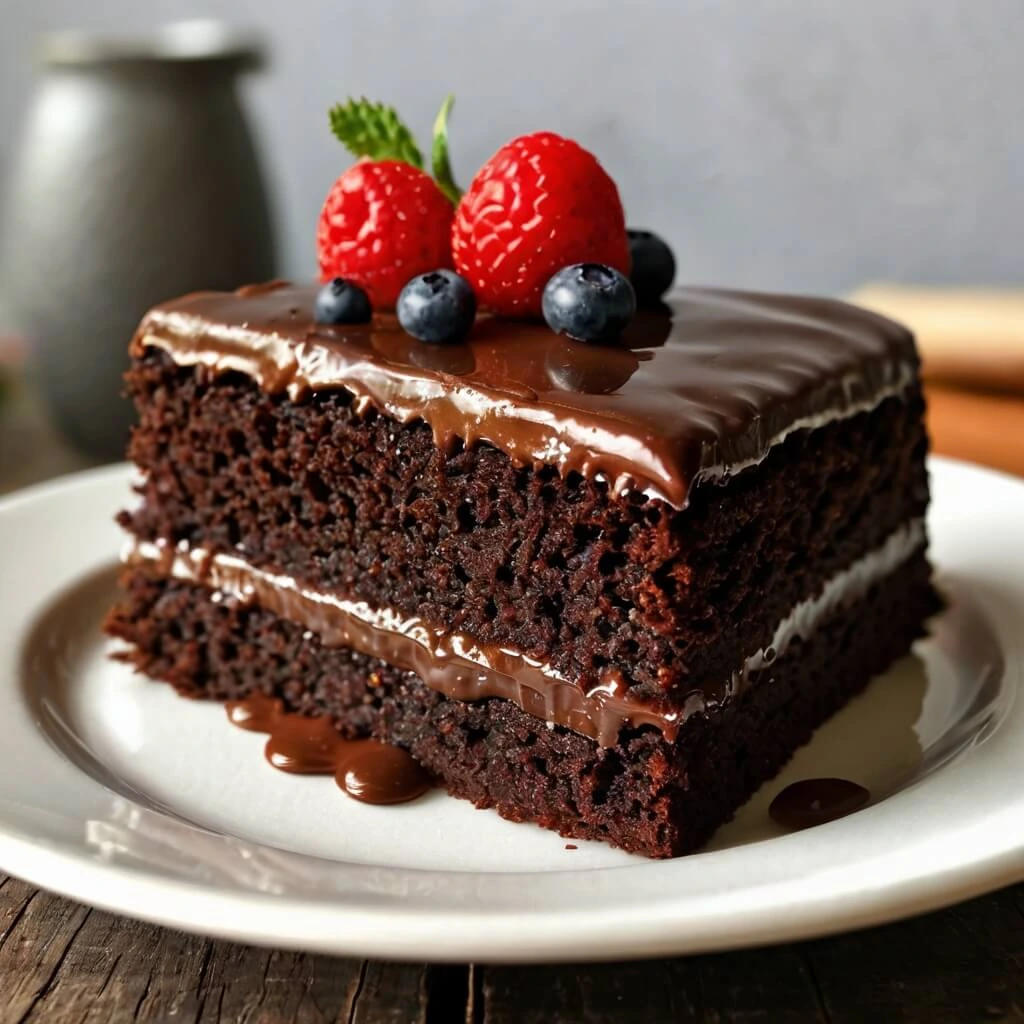
- Versatile: Serve it plain or dress it up with frosting, fresh fruit, or ice cream.
This chocolate cake isn’t just a recipe—it’s a celebration of rich, homemade goodness that your loved ones will rave about.
Table of Contents
Key Ingredients for the Perfect Homemade Chocolate Cake + Substitutions
Creating this indulgent dessert requires just a few essential ingredients. Here’s everything you’ll need, along with some tips and substitutions:
Dry Ingredients
- All-Purpose Flour: Provides structure to the cake. Swap in gluten-free flour to make this cake gluten-free.
- Granulated Sugar: Sweetens the batter. Brown sugar can be used for a slightly richer taste.
- Unsweetened Cocoa Powder: The star ingredient that gives the cake its deep chocolate flavor. Opt for Dutch-processed cocoa for a smoother, less acidic taste.
- Baking Powder & Baking Soda: Ensure a light, fluffy texture by creating lift.
Wet Ingredients
- Eggs: Add moisture and act as a binder for the ingredients. Replace with flaxseed eggs or applesauce for a vegan option.
- Milk: Enhances the cake’s softness. Replace regular milk with almond or oat milk for a dairy-free version.
- Vegetable Oil: Ensures the cake stays soft and moist. Melted butter or coconut oil works well as substitutes.
- Vanilla Extract: Enhances the chocolate flavor with a subtle vanilla note.
Extras
- Boiling Water or Coffee: Intensifies the chocolate flavor and makes the batter smooth. Coffee enhances the richness without leaving a noticeable taste.
🌟 Tip: Always use room-temperature ingredients for a smoother batter and even baking.
Prep Time, Bake Time, & Servings for This Rich Chocolate Cake
Here’s a quick breakdown of the time and servings:
| Step | Time |
| Prep Time | 15 minutes |
| Bake Time | 30-35 minutes |
| Cooling Time | 10 minutes |
| Total Time | 55-60 minutes |
This recipe yields 12 servings, making it ideal for family treats or small gatherings. For smaller portions, halve the recipe, or double it for a larger crowd.
🌟 Pro Tip: Always test for doneness with a toothpick—it should come out clean or with a few moist crumbs.
Essential Kitchen Tools for Making the Perfect Homemade Chocolate Cake
Baking a flawless homemade chocolate cake is easier when you have the right tools at your disposal. Here’s what you’ll need to achieve bakery-level results:
Essential Tools:
- Mixing Bowls: One large and one medium for wet and dry ingredients.
- Whisk & Spatula: A whisk ensures lump-free batter, while a silicone spatula helps scrape every last bit of goodness.
- Electric Mixer: Speeds up the mixing process and creates a smooth, airy batter. If you don’t have one, a sturdy hand whisk will do the job with a little extra elbow grease.
- 9-Inch Round Cake Pans (2): Ensures even baking. For a single-layer cake, use a 9×13-inch pan.
- Parchment Paper: Keeps the cake from sticking and simplifies cleanup.
- Cooling Rack: Crucial for proper airflow to cool the cake evenly without sogginess.
Substitutions:
- No Cake Pans? A cast iron skillet or an oven-safe dish of equivalent size works well for baking.
- No Electric Mixer? A wooden spoon and some patience will get the job done.
🌟 Pro Tip: Always grease and line your pans with parchment paper to avoid cake disasters during unmolding.
Step-by-Step Guide to Perfect Homemade Chocolate Cake
Follow these simple steps to bake a consistently rich and moist chocolate cake.
Step 1: Prep Your Workspace
- Preheat your oven to 350°F (175°C).
- Grease two 9-inch round cake pans and line them with parchment paper.
Step 2: Mix the Dry Ingredients
- In a large bowl, whisk together 2 cups all-purpose flour, 2 cups granulated sugar, ¾ cup unsweetened cocoa powder, 1½ tsp baking powder, 1½ tsp baking soda, and 1 tsp salt.
Step 3: Combine the Wet Ingredients
- In a medium bowl, beat 2 eggs, 1 cup milk, ½ cup vegetable oil, and 2 tsp vanilla extract until smooth.
Step 4: Bring it Together
- Gradually mix the wet ingredients into the dry until the batter achieves a smooth consistency. Add 1 cup boiling water or hot coffee slowly while mixing. The batter will be thin but don’t worry—this is what creates a moist cake!
Step 5: Bake
- Evenly distribute the batter into the prepared pans.
- Bake for 30-35 minutes, checking with a toothpick to ensure it comes out clean when inserted.
Step 6: Cool and Serve
- Let the cakes cool in the pans for 10 minutes, then transfer them to a cooling rack. Frost with your favorite icing or dust with powdered sugar before serving.
🌟 Timing Tip: If using a 9×13-inch pan, bake for 35-40 minutes.
What Makes This Chocolate Cake Special
This isn’t just any chocolate cake—it’s a game-changer! Here’s why:
- Perfectly Moist Texture: The secret lies in the boiling water (or coffee), which ensures the cake stays soft and rich.
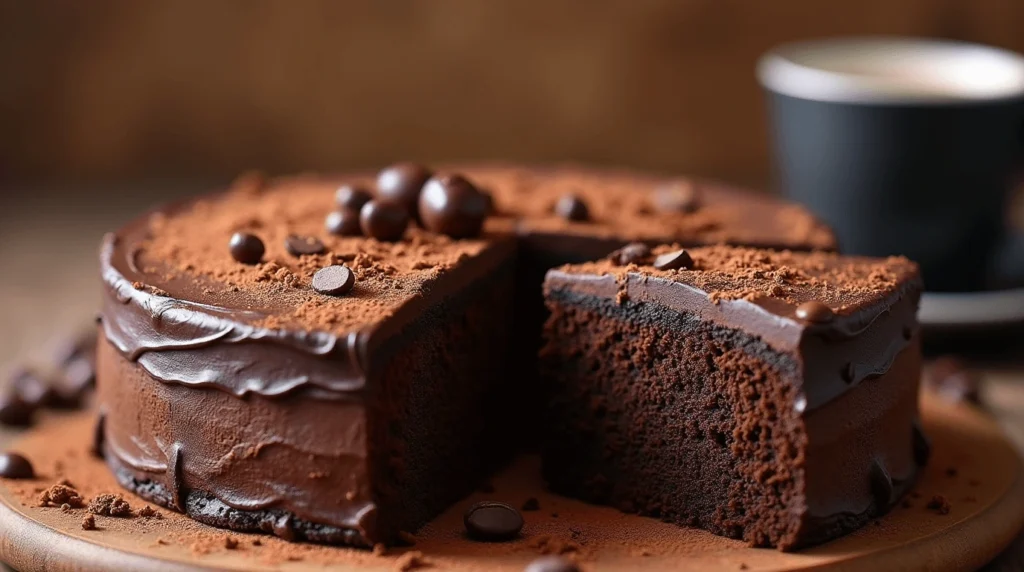
- Deep Chocolate Flavor: Using high-quality cocoa powder and optional coffee brings out the boldness of the chocolate.
- Versatile for Any Occasion: From birthdays to dinner parties, this cake is a crowd-pleaser.
- Foolproof for Beginners: With simple steps and no fancy equipment required, anyone can bake this beauty.
🌟 Fun Fact: This recipe was inspired by classic diner cakes known for their simplicity and irresistible flavor.
Delicious Variations for Homemade Chocolate Cake
Want to make this chocolate cake even more exciting? Try these variations to suit your taste and dietary needs:
Flavor Twists:
- Dark Chocolate Lovers: Add ½ cup of melted dark chocolate to the batter for a richer flavor.
- Mint Chocolate: Mix in 1 tsp peppermint extract for a refreshing twist.
- Spiced Chocolate: Add a pinch of cinnamon and cayenne for a Mexican-inspired treat.
Frosting Ideas:
- Classic Buttercream: Whip up a creamy chocolate buttercream for a timeless finish.
- Ganache Glaze: Pour a shiny ganache over the cake for a sophisticated look.
- Whipped Cream & Berries: Light and fresh, perfect for summer gatherings.
Dietary Adaptations:
- Gluten-Free: Substitute all-purpose flour with a 1:1 gluten-free baking mix.
- Dairy-Free: Use almond milk and coconut oil instead of milk and vegetable oil.
- Sugar-Free: Swap granulated sugar with a sugar-free alternative like erythritol.
🌟 Pro Tip: Experiment with toppings like chopped nuts, chocolate shavings, or sprinkles to make your cake visually stunning!
Pro Tips for Achieving the Ultimate Homemade Chocolate Cake
Even the simplest recipes can benefit from a few expert tricks. Use these tips to elevate your baking and ensure every slice of your chocolate cake is flawless.
Baking Tips:
- Accurate Measurements: Weigh ingredients like flour and cocoa powder with a kitchen scale to avoid a dense cake.
- Room Temperature Ingredients: Ensure your eggs, milk, and oil are at room temperature for a smoother batter and even baking.
- Don’t Overmix: Mix until just combined to avoid developing gluten, which can lead to a tough texture.
- Tap the Pans: Lightly tap the filled pans on the counter to remove air bubbles before baking.
Serving Tips:
- Slice Cleanly: Use a sharp knife dipped in warm water for clean slices, wiping the blade between cuts.
- Storage: Store leftover cake in an airtight container at room temperature for up to 2 days or refrigerate for up to a week.
🌟 Pro Tip: For an ultra-moist cake, brush the layers with simple syrup before frosting.
FAQs About Homemade Chocolate Cake
Q: Can I make this cake in advance?
A: Yes! Bake the cake up to two days in advance, wrap the layers tightly in plastic wrap, and store them at room temperature. Frost just before serving.
Q: How can I make this recipe vegan?
A: Replace the eggs with flaxseed or chia seed eggs, use almond or oat milk instead of regular milk, and opt for coconut oil instead of butter.
Q: What if I don’t have cocoa powder?
A: You can substitute unsweetened chocolate by melting it and reducing the oil in the recipe slightly.
Q: Why is my cake sinking in the middle?
A: Overmixing or opening the oven door too early can cause this. Be sure to follow the recipe steps and baking times carefully.
🌟 Pro Tip: For additional help, consider a toothpick test—insert it in the center, and if it comes out clean, the cake is ready.
Pairing Suggestions: What to Serve with Homemade Chocolate Cake
Enhance your chocolate cake experience by pairing it with complementary sides and beverages. Whether you’re hosting a party or enjoying a cozy dessert at home, these ideas will make your treat even more delightful.
Classic Pairings:
- Vanilla Ice Cream: The cold creaminess perfectly balances the cake’s rich, warm flavors.
- Whipped Cream: Light and airy, this is a simple yet elegant addition.
- Fresh Berries: Add a pop of color and tartness with strawberries, raspberries, or blackberries.
Regional Twists:
- Italian Affogato: Top a slice of cake with a shot of hot espresso for a European-style indulgence.
- French Pairing: Serve with a small glass of dessert wine like Banyuls or Port for a luxurious touch.
- American Classic: Pair with a tall glass of cold milk for the ultimate comfort food experience.
Creative Ideas:
- Salted Caramel Sauce: Drizzle over the cake for a sweet-salty contrast.
- Cheesecake Frosting: Use as an alternative to traditional chocolate frosting for a creamy variation.
🌟 Pro Tip: For a themed gathering, pair your cake with a dessert buffet featuring complementary treats like brownies or truffles.
Nutrition Facts for Homemade Chocolate Cake
Understanding the nutritional content of your homemade chocolate cake can help you enjoy it mindfully. Below is the breakdown for one slice (based on a standard 12-slice cake).
| Nutrient | Amount (per serving) | % Daily Value |
| Calories | 350 kcal | 18% |
| Total Fat | 15 g | 23% |
| Saturated Fat | 7 g | 35% |
| Cholesterol | 45 mg | 15% |
| Sodium | 250 mg | 10% |
| Total Carbohydrates | 50 g | 17% |
| Dietary Fiber | 3 g | 12% |
| Sugars | 30 g | – |
| Protein | 5 g | 10% |
| Iron | 2 mg | 11% |
| Calcium | 50 mg | 5% |
Dietary Insights:
- Vegetarian-Friendly: Contains no meat-based ingredients.
- Allergens: Includes eggs, dairy, and gluten.
- Key Benefits: High in antioxidants from cocoa powder.
🌟 Pro Tip: To reduce calories, substitute sugar with a natural sweetener like stevia or use unsweetened applesauce.
The Story Behind Chocolate Cake
This classic dessert has a rich and intriguing history. Originating in the 18th century, its roots lie in the combination of cocoa powder and traditional cake recipes. Chocolate became more accessible in the mid-1800s, thanks to advancements in processing techniques by companies like Van Houten and Cadbury.
Over the years, chocolate cake has evolved from simple cocoa-flavored sponges to the rich, layered desserts we know today. From its debut in Victorian tea rooms to becoming a symbol of celebration in the modern era, this dessert has remained a global favorite.
🌟 Cultural Note: In the United States, chocolate cake gained immense popularity in the early 20th century, particularly after the introduction of boxed cake mixes, making it a household staple.
Let’s See Your Chocolate Cake Creations!
We’d love to see how your chocolate cake turns out! Whether you stick to the classic recipe or try one of the exciting variations, share your creations with us. Leave a comment below to tell us how it went, or tag us on Instagram with #MyChocolateCake for a chance to be featured.
Quick, easy, and absolutely decadent—this homemade chocolate cake is a must-try for dessert lovers. What are you waiting for? Preheat your oven, grab your whisk, and let’s bake some magic!
🌟 Don’t forget to rate this recipe and share your favorite pairing ideas in the comments. Share your thoughts to help us improve and bring you even better recipes!