
Why You’ll Love This Homemade Apple Pie
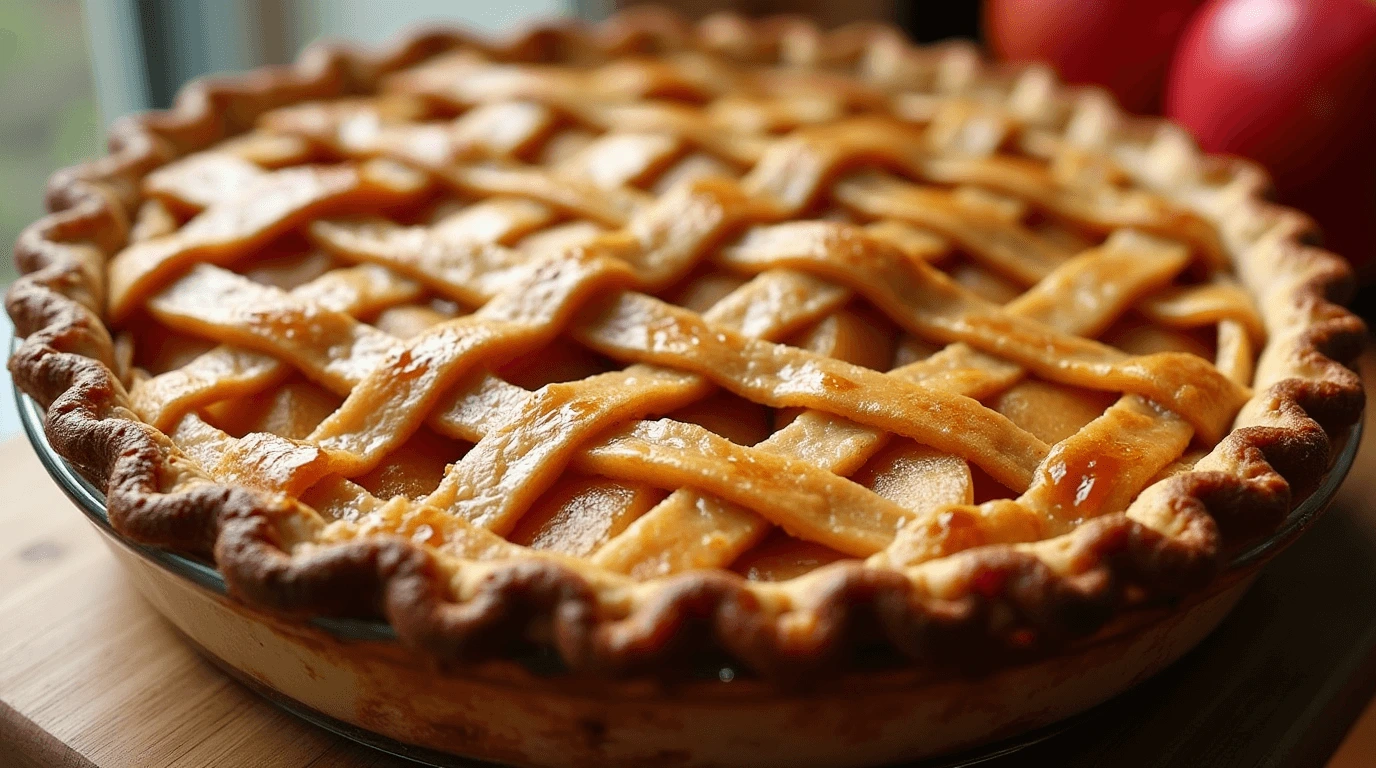
If you’re craving a comforting dessert that’s as timeless as it is delicious, then this homemade apple pie is the answer! It’s the perfect balance of sweet, tart apples, warm spices, and a buttery, flaky crust.
Best of all, it’s incredibly easy to make with pantry staples. Whether you’re baking for a special occasion or simply looking to satisfy a sweet tooth, this classic apple pie recipe will become your go-to.
Prep time is only 20 minutes, with a total time of about 1 hour and 10 minutes. That makes it quick enough for any weeknight but impressive enough for a gathering. It serves 8 people and is bound to leave everyone asking for seconds.
You’ll love how simple it is to pull together yet how deliciously satisfying the result is.
Table of Contents
Ingredients You’ll Need: Key Ingredients for Classic Apple Pie + Substitutions
For this homemade apple pie, gather the following ingredients:
For the Pie Crust
- 2 ½ cups all-purpose flour
- 1 cup of unsalted butter, chilled and diced into small pieces
- 6-8 tbsp ice water
- 1 tsp salt
- 1 tbsp sugar
For the Filling
- 6-8 medium apples (Granny Smith or Honeycrisp work best for balance)
- ¾ cup granulated sugar
- 2 tbsp all-purpose flour
- 1 tsp ground cinnamon
- ½ tsp ground nutmeg
- 1 tbsp lemon juice
- 1 tbsp unsalted butter (cut into small cubes)
For the Topping (Optional)
- 1 egg (for egg wash)
- 1 tbsp coarse sugar (for sprinkling)
Substitutes for Ingredients:
- If you don’t have unsalted butter, you can use salted butter, but reduce the amount of salt in the crust.
- Don’t have cinnamon or nutmeg? You can substitute with apple pie spice mix.
- For a gluten-free option, you can use a gluten-free flour blend in the crust, though the texture may vary slightly.
- If you prefer a dairy-free pie, use plant-based butter and skip the egg wash.
Serving Tip: If you’re serving a crowd or want to adjust for fewer people, simply halve the recipe or use smaller apples for individual pies!
Timing and Servings: Prep Time, Cook Time, & Servings
| Step | Time |
| Prep Time | 20 minutes |
| Cook Time | 50 minutes |
| Total Time | 1 hour 10 minutes |
| Serves | 8 people |
Pro Tip: For the best texture, let the pie cool for at least 30 minutes before cutting. This gives the filling time to set and makes serving much easier!
Essential Tools for Making Classic Apple Pie
Before you get started, make sure you have these essential kitchen tools to help make your homemade apple pie a success:
- Pie Dish: A 9-inch dish is ideal for this recipe. If you don’t have a traditional pie dish, a deep baking dish or even a tart pan can work as alternatives.
- Rolling Pin: A rolling pin ensures even dough thickness for your pie crust.. If you don’t have one, you can use a wine bottle or any long cylindrical object.
- Mixing Bowls: A large mixing bowl is needed to toss the apples with sugar and spices. You’ll also need a smaller bowl for the flour and butter when making the crust.
- Pastry Cutter or Fork: This tool is perfect for cutting cold butter into flour for the pie crust. No pastry cutter? A fork works just as well for blending the dough.
- Sharp Knife: Use a sharp knife to peel and slice the apples uniformly.
- Basting Brush: For applying the egg wash (optional) on the crust to give it a beautiful golden shine.
- Baking Sheet: Place the pie dish on a baking sheet to catch any drips from the filling as it bakes.
- Cooling Rack: After baking, a cooling rack ensures your pie sets properly and prevents the crust from becoming soggy.
Step-by-Step Guide: Easy-to-Follow Instructions for Perfect Homemade Apple Pie
Making this classic apple pie is a breeze when you follow this simple guide. Here’s a step-by-step breakdown:
Step 1: Prepare the Pie Crust
Start by making your pie crust. In a large bowl, mix together the flour, salt, and sugar. Add the cold butter cubes and use a pastry cutter (or fork) to work the butter into the flour until it resembles coarse crumbs. Slowly incorporate the ice water, one tablespoon at a time, until the dough starts forming. Split the dough in two, wrap each half in plastic, and chill for at least 30 minutes.
Step 2: Prepare the Apple Filling
While the dough rests, peel, core, and slice the apples. In a large mixing bowl, toss the apple slices with sugar, flour, cinnamon, nutmeg, and lemon juice. Coat the apples thoroughly with the mixture, then set aside to allow the flavors to blend.
Step 3: Roll Out the Dough
Once your dough has chilled, take one portion and roll it out on a floured surface into a 12-inch circle. Carefully transfer it to your pie dish, pressing the dough into the edges. Cut away any excess dough, leaving a one-inch overhang.
Step 4: Assemble the Pie
Spoon the apple mixture into the pie crust. Add small butter pieces to the filling. Roll out the second dough portion and place it on top of the pie, trimming the edges and crimping them to seal. Make a few slits in the top crust to let the steam escape during baking.
Step 5: Apply the Egg Wash
For a glossy, golden finish, brush the crust with an egg wash (beaten egg mixed with a tablespoon of water). Sprinkle with coarse sugar for added crunch and sweetness.
Step 6: Bake the Pie
Preheat your oven to 375°F (190°C). Bake the pie for 50-60 minutes or until the crust is golden and the filling is bubbling. If the edges of the crust brown too fast, cover them with foil to prevent burning.
Step 7: Cool the Pie
After baking, cool the pie on a wire rack for at least 30 minutes to let the filling firm up for easier slicing.
Why This Homemade Apple Pie Stands Out
What makes this apple pie so special is the combination of perfectly spiced apples and a buttery, flaky crust. The secret ingredient? A splash of lemon juice in the filling, which enhances the sweetness of the apples while balancing the spices. The homemade crust is light and tender, offering a perfect contrast to the warm, spiced apple filling. Unlike store-bought versions, this pie doesn’t have artificial flavors or preservatives—just pure, wholesome goodness from ingredients you can trust. It’s simple, yet elegant, making it a standout dessert for any occasion.
8. Delicious Variations for Classic Apple Pie
While the classic version of this apple pie is always a hit, there are plenty of fun variations you can try to mix things up:
- Dutch Apple Pie: Top your pie with a crumbly streusel topping made from butter, sugar, and flour for a crunchy, sweet contrast to the soft apples.
- Caramel Apple Pie: Add a rich layer of homemade or store-bought caramel sauce to the apple filling for extra sweetness and depth of flavor.
- Apple Pie with a Twist: For a unique spin, try adding a handful of cranberries to the filling. The tartness complements the sweetness of the apples beautifully.
- Gluten-Free Apple Pie: Swap out the all-purpose flour for a gluten-free flour blend. You can also use a pre-made gluten-free crust if you want to save time.
- Vegan Apple Pie: Use plant-based butter and substitute the egg wash with almond milk for a dairy-free version. The pie will still turn out perfectly flaky and delicious!
Each variation offers a new take on the classic recipe, so feel free to experiment and find your favorite version.
Expert Tips for Perfect Homemade Apple Pie
To ensure your homemade apple pie turns out perfect every time, here are some expert tips that will help you avoid common mistakes and take your pie to the next level:
- Combine Sweet and Tart Apples: For a balanced flavor, use a mix of sweet and tart apples.. Some popular choices include Granny Smith (tart) and Honeycrisp or Fuji (sweet). This balance of flavors will give your pie the perfect depth.
- Don’t Overwork the Dough: When making the pie crust, be sure to handle the dough as little as possible. Be careful not to overwork the dough, or the crust may turn out tough instead of flaky. Mix just until the dough comes together and then refrigerate to chill.
- Chill the Dough: Always chill the dough before rolling it out. This prevents the butter from melting too soon, which helps the crust stay flaky.
- Pre-Cook the Filling for Better Texture: Some bakers prefer to pre-cook the apple filling on the stovetop for a few minutes to soften the apples and thicken the filling. This can prevent the crust from getting soggy, especially with juicier apples.
- Don’t Skip the Egg Wash: Brushing the top crust with an egg wash (beaten egg mixed with a little water) gives the pie a beautiful golden color and a glossy finish. It also helps to seal the crust together.
- Let the Pie Cool: While it’s tempting to slice into your warm pie right away, letting it cool for at least 30 minutes ensures the filling sets, making it easier to cut and serve.
Storage & Reheating Tips for Classic Apple Pie
Apple pie is a beloved dessert that you’ll likely want to enjoy again, so here’s how to store and reheat it:
- How to Store: Store leftover apple pie at room temperature for up to 2 days, covered loosely with plastic wrap or foil. To store for longer, wrap the pie tightly and refrigerate it for up to 5 days.
- Can You Freeze Apple Pie?: Yes! Apple pie freezes beautifully. To freeze, wrap the pie tightly in plastic wrap and aluminum foil and place it in the freezer for up to 3 months. Make sure the pie is fully cooled before freezing.
- Reheating Tips: To reheat, place the pie in a preheated oven at 350°F (175°C) for about 15 minutes or until it’s heated through. If you froze the pie, bake it from frozen at the same temperature for 45-50 minutes, covering it with foil if the crust starts to brown too much.
- Reheat Individual Slices: If you only need a slice, heat it in the microwave for about 20-30 seconds or until warm, though the crust might not be as crispy as when baked in the oven.
Avoid These Mistakes When Making Classic Apple Pie
While making apple pie is relatively simple, there are a few common mistakes to watch out for:
- Mistake: Not Using Enough Apples
Solution: A pie should be generously filled with apples. If you don’t have enough apples, the filling will shrink as it bakes. Use around 6 cups of sliced apples for a standard 9-inch pie. - Mistake: Overworking the Pie Crust
Solution: As mentioned earlier, overworking the dough can result in a tough crust. Handle the dough gently and minimally to maintain its flakiness and tenderness. - Mistake: Soggy Bottom Crust
Solution: To prevent a soggy bottom, place the pie dish on a preheated baking sheet. You can also sprinkle the bottom crust with a bit of flour or cornstarch before adding the filling, which will help absorb the juices. - Mistake: Not Enough Spice
Solution: Apple pie should have a warm, spiced flavor. Make sure to use cinnamon, nutmeg, and a pinch of cloves to enhance the apple filling. Don’t skimp on these spices! - Mistake: Cutting the Pie Too Soon
Solution: Resist the urge to cut into the pie immediately after baking. Let it cool for at least 30 minutes so the filling can set properly. This will ensure cleaner slices and prevent the filling from running out.
Your Questions About Apple Pie, Answered
Q1: Can I make apple pie in advance?
Yes, you can make apple pie a day or two in advance. Simply store it at room temperature, covered loosely with plastic wrap or foil, and it will stay fresh. If you make the pie further in advance, freezing it is a great option!
Q2: Can I double the apple pie recipe?
Absolutely! If you’re serving a crowd, doubling the recipe is easy. Just make sure you have a large enough pie dish and adjust the baking time as needed. It may take a little longer to bake, so keep an eye on it.
Q3: What sides go well with apple pie?
Apple pie is perfect with whipped cream, vanilla ice cream, or cinnamon ice cream. For extra indulgence, try it with a drizzle of caramel sauce or a dollop of fresh whipped cream.
Q4: How can I make my apple pie filling less runny?
To prevent runny filling, use a thickening agent like flour or cornstarch in the apple filling. This helps absorb the juices released by the apples as they cook. Also, avoid using overly juicy apple varieties like Red Delicious.
Q5: Can I use frozen pie crust for this recipe?
Yes, you can use frozen pie crust for a quicker option. Just be sure to thaw it according to the package instructions before use. You can also brush the crust with an egg wash to give it that golden, flaky finish.
What to Serve with Homemade Apple Pie
Apple pie is a timeless dessert that can be paired with a variety of delicious sides, making it perfect for any occasion. Here are some great pairing suggestions that will complement the sweet and spicy flavors of your pie:
- Classic Pairings: Serve your apple pie with a scoop of vanilla ice cream or a dollop of freshly whipped cream. The cool, creamy texture balances the warm, spiced pie beautifully.
- Regional Twist: For a Canadian-inspired twist, try pairing your apple pie with a serving of poutine—crispy fries topped with cheese curds and smothered in gravy. It’s an unexpected yet delicious combination!
- Light and Fresh: Pair your pie with a light Caesar salad for a fresh contrast to the rich sweetness of the dessert. The tangy dressing and crunchy croutons will add a satisfying crunch.
- Autumn Twist: In the fall, try pairing your apple pie with a spiced chai latte or hot cider to enhance the cozy, warm flavors. The spices in the drink will complement the cinnamon and nutmeg in the pie perfectly.
- For a Crowd: If you’re serving apple pie at a gathering, pair it with a cheese platter for a delightful contrast. Sharp cheeses like cheddar or gouda bring a savory balance to the sweetness of the pie.
Nutrition Facts for Homemade Apple Pie
Here’s a detailed breakdown of the nutrition for one slice (1/8 of a 9-inch pie) of classic homemade apple pie. Keep in mind that the nutrition values may vary depending on the exact ingredients used.
| Nutrient | Per Serving | % Daily Value |
| Calories | 320 kcal | 16% |
| Total Fat | 18 g | 28% |
| – Saturated Fat | 8 g | 40% |
| – Unsaturated Fat | 8 g | N/A |
| – Trans Fat | 0 g | N/A |
| Cholesterol | 25 mg | 8% |
| Sodium | 150 mg | 6% |
| Total Carbohydrates | 38 g | 13% |
| – Dietary Fiber | 3 g | 12% |
| – Sugars | 21 g | N/A |
| Protein | 2 g | 4% |
| Vitamins & Minerals | ||
| – Vitamin A | 4% | |
| – Vitamin C | 6% | |
| – Calcium | 2% | |
| – Iron | 4% | |
| Dietary Details | ||
| – Allergens | Gluten, Dairy | |
| – Special Diet Suitability | Vegetarian |
Key Benefits:
- Provides a satisfying dessert with a balance of carbohydrates and fats.
- Rich in dietary fiber from the apples, supporting digestion.
- A great source of Vitamin C, especially if served with fresh cream or a fruit salad.
The Story Behind Apple Pie
Apple pie is a beloved dessert with a rich history that dates back to early European settlers. While the exact origin of the apple pie is debated, it’s believed to have roots in England, where apples were cultivated and pie recipes were common by the 14th century. The famous phrase “as American as apple pie” came about in the 20th century, symbolizing the pie’s role as a quintessential American dessert.
The recipe has evolved over the years, with Americans adding their own regional twists, such as using different apple varieties and incorporating spices like cinnamon and nutmeg. Apple pie represents more than just a dessert; it’s a symbol of family, tradition, and comfort, often served at holiday gatherings, festivals, and special occasions.
Let’s See Your Apple Pie Creations!
We’d love to hear how your homemade apple pie turned out! Leave a comment below or tag us on Instagram with #MyDeliciousApplePie and share your tips and creative twists. Whether you stuck to the classic recipe or added your own flair, your version of this timeless dessert is sure to be a hit!
Quick, easy, and oh-so-delicious—this homemade apple pie is a must-try for any dessert lover. Don’t forget to rate this recipe and share your thoughts in the comments. Happy baking!